hardware
Panel layout
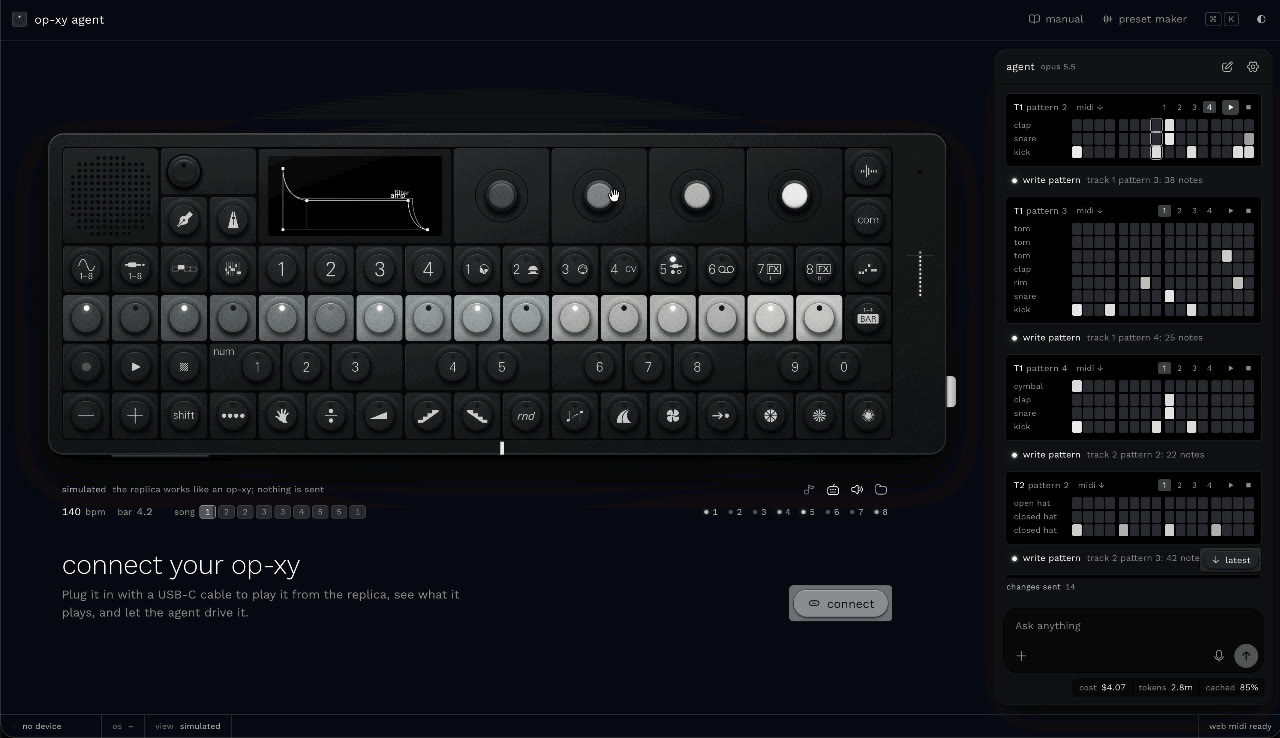
A map of the top panel — mode keys, module keys, track and step keys, transport, keyboard, function keys, encoders, screen and sockets — and the names this manual uses for each.
The OP-XY packs everything into one flat grid of square keys, so a few landmarks make it easy to find your way. The left block is about where you are: the four mode keys (, , , ) and, below them, the transport. The middle is about what you edit: the module keys … under the screen choose a page, the track keys under the encoders choose a track, and the step keys below them are the sequencer. The right-hand column holds the utility keys (, , , ).
Most editing follows one pattern: pick a mode, pick a track, pick a page, then …. reaches a second layer of almost every key and page, and the keyboard's white and black keys double as step-component and number keys when a page asks for them.
How to
Switch to another main mode
- 1
Open one of the current mode's module pages
- 1
Show the shift-layer parameters of the current page
- 1 the extra parameters stay while shift is down
Choose the track to edit
- 1
Restart playback from the top of the pattern
before you start playback is running
- 1
Stop and silence everything
- 1
Move the keyboard an octave down or up
- 1
Check the battery level
- 1 read the level meter in the top right margin
Details
- measured
Seen from above, the controls sit on a grid of 17 columns and 6 rows. The top two rows hold the speaker, the volume knob, the screen and the four encoders; keys fill the four rows below.
- measured
Row three runs mode keys, …, then …; row four is …; the bottom two rows put , , above , , on the left, with the keyboard to their right.
- measured
The rightmost column holds , , and , top to bottom; and sit just below the volume knob.
- TE’s guide
Four keys pick the main mode: for the eight sound tracks, for the eight utility tracks (brain, punch-in FX, external gear, tape, send effects), for patterns, scenes and songs, and for levels, pans, EQ and the master compressor.
- TE’s guide
The keys printed 1 to 4 directly under the screen are the module keys, written …. Each opens one page of the current mode, and the four encoders then edit what that page shows.
- TE’s guide
Arrange is the only main mode without module pages.
- TE’s guide
Some pages keep a second set of parameters on a shift layer, reached by holding .
- TE’s guide
The eight track keys under the encoders choose which track you edit — an instrument track in instrument mode, an auxiliary track in auxiliary mode.
- TE’s guide
The sixteen step keys across the middle form the step sequencer, the grid you program notes and sounds into.
- TE’s guide
arms recording of notes and knob moves, starts playback and halts it.
- TE’s guide
Pressing again during playback jumps back to the start of the pattern.
- TE’s guide
A second press of cuts off every note and sound that is still ringing.
- community
On OS 1.1.33 one stops playback, and then starts from the beginning — a pattern from its first step, a song from its first scene — with a MIDI start, never a continue. A 1.1.25 tutorial says so and a 1.2 one shows it. What the step keys show after the stop is not yet checked on 1.1.x.
- community
In tutorial videos on OS 1.0.x, unlike 1.1.33, one during playback pauses — the position is kept and the step keys stay on the bar the playhead stopped in — and carries on from there; a song carries on in its scene.
- community
In the same videos a while already stopped goes back to the start, so and then starts from the top.
- TE’s guide
and move the keyboard one octave down or up; several pages give them other jobs.
- checked on a unit · 1.1.33
On an instrument page, and bring up a small white card low in the middle of the screen, with a mini keyboard and the octave offset in thin digits (+0, +1, −1, −3 …). On the external CV page the offset appears inside the meter card instead.
- community
The octave card stays about 1.08 s after the last press of or , then disappears from one frame to the next, without a fade (tutorial videos, OS 1.0.x).
- TE’s guide
does nothing alone: held with another key it opens that key's secondary function or page.
- TE’s guide
The two-octave keyboard of 24 keys lies right of the transport keys, below the step keys.
- TE’s guide
Every white key carries the icon of one step component; counted from the left they are ….
- TE’s guide
The ten black keys double as number keys, marked 1–9 and 0 from the left; this manual calls them ….
- TE’s guide
(top right corner) starts sampling from any screen.
- TE’s guide
opens the list of projects, where you create, open and manage them.
- TE’s guide
sets the song speed, the swing and the metronome.
- TE’s guide
is the hub for system settings, wired and wireless connections and output routing.
- TE’s guide
turns the notes of a track into arpeggios, chords and other note effects.
- TE’s guide
lengthens the sequence and holds sequence-wide settings such as quantisation.
- TE’s guide
The volume knob is at the top left, next to the speaker.
- TE’s guide
The four encoders shade from dark to light: dark gray, mid gray, light gray and white. This manual calls them , , and in that order.
- TE’s guide
The pitchbend strip on the lower left edge responds to pressure — push its left end to bend down, its right end to bend up.
- TE’s guide
The right side carries the power switch, the USB-C port and four 3.5 mm jacks — audio out, multi-out, MIDI in and audio in.
- TE’s guide
A small built-in microphone and a vertical LED level meter sit in the top right margin.
- TE’s changelog
Holding turns the level meter into a rough battery gauge.